
MANDATORY DISCLAIMER! What I describe on this page is dangerous and stupid. It involves fire, melting substances that create toxic chemicals upon the application of heat, soldering, and ruining one, possibly two, perfectly good keyboards.
Like many children, the Saturdays of my childhood were spent watching cartoons until mid-afternoon, when the networks would switch over to some random low budget film. Usually filmed in the early eighties, but with cinematography that made it look like it came from the seventies, occasionally with a now famous actor but mostly a string of b-list actors in trite, predictable roles. One of these films was Fortress. A science fiction prison escape film with cyborgs. The film itself kinda sucked, but there was a great moment in movie hacking history. One of the prisoners (who died immediately thereafter, rule number 3 of Saturday afternoon movies, the only survivors are the hero and his girl) was a deranged programmer named D-Day. He destroyed the compound's computers and disabled the cyborg guards by guessing the password in one try ("Crime Does Not Pay", the motto of the facility and the second most common line in the film behind INTESTINATE!) and typing "upload D-Days revenge virus $384321".
Even at the grand young age of seven I knew that computers didn't work that way, but I was completely captivated by the terminal. There was a large array of monitors, capable of displaying individual information or be linked together to display a single image, voice control, and a keyboard inbuilt to the chair. I've found two monitors to be adequate, can type fast enough that voice control would just get in the way, but always had a standard solid keyboard.
As someone who does 90% of his work in a terminal, a good keyboard is a must. The inspiration for this project came from spilling coffee on my keyboard for the fiftieth time and having to use my waterproof roll up again. Typing on a keyboard that has no tactile transition from not pressed to pressed is not something I wished to do again, but giving up drinking coffee while working was not an option. Unlike standard keyboards, a chair mounted keyboard isn't leaned over while typing, making spills less likely. It was time to make my workstation complete.
The cheapest manufactured keyboard I could find cost over 200 dollars without mounting equipment. It lacked the individual spring loaded mechanical keys I love or with a layout that moves keys out from under the pinkie where stretching can lead to aches. So I did what any self-respecting geek would do: Built my own.
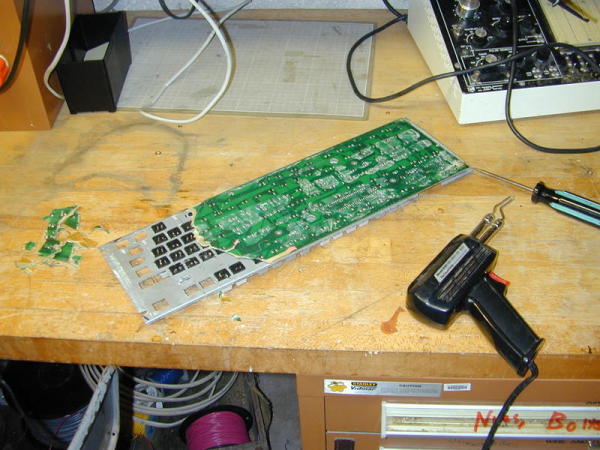
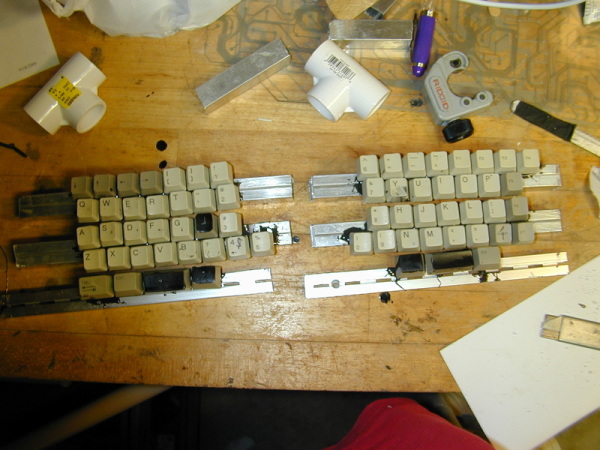
I started with a dead Dell keyboard that I purchased for $2.00 at a garage sale. This particular model was driven with individual pushbutton switches that were held in place by a metal bracket and soldered to a circuit board. I removed all of the keys by melting the solder with a 120 watt iron, lifting the board off of the lead, and then breaking that part of the board off. This netted me a hundred normally open pushbuttons for two bucks and a bit of work, about 2/3 of which were used for this project. I lost three of the switches to overzealous lifting and another via melting the plastic, but since I didn't plan on replicating a 102 key keyboard, this was acceptable.
I didn't want to worry about tripping over cables and jerking my computer off the desk, so I picked up a $35 Microsoft >spit< keyboard and mouse set with a $10 dollar rebate to hack for this project. AA cell batteries were included, but I decided to hook the keyboard up to D cells to preclude the need for changing them before the decade's out.
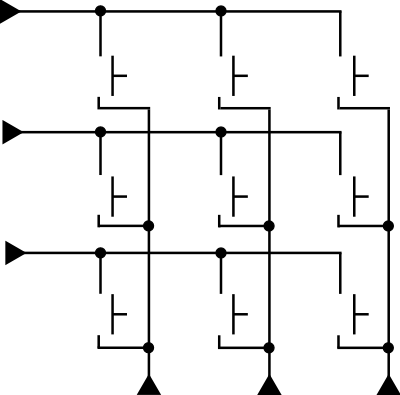
Non pushbutton keyboards (90%+ of the keyboards you will find, including the MS keyboard) work by having two plastic sheets on top of each other with lines painted on in conductive paint. Pressing a key collapses a rubber dome, pressing the top sheet onto the bottom sheet causing a short, which is detected by the circuit. If each key had it's own input pin, the microcontroller would need 103 pins + ground to read all of the keys. Pins are expensive, and there's an easier way to do it known as multiplexing. The various keys are wired in a virtual grid. The first terminal of each key is wired in parallel with the keys in the same row, the second terminal is wired in parallel with all of the keys in the same column. Power is provided to a single column at a time, and the input only reads the key states for that row. The controller cycles through each row at a time, hundreds of times a second, so the end process is transparent to the user.
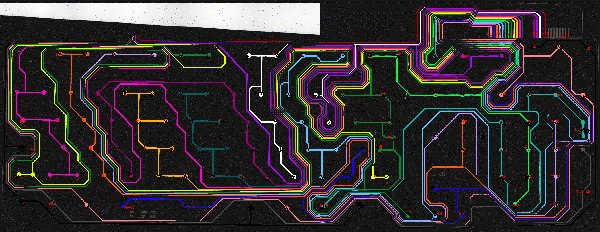
Of course, it's not quite this simple. For various reasons, the keys aren't laid out in a grid, but in a sort of maze of traces. Unlike wires, electric ink is a 2-dimensional medium, so traces cannot cross without shorting. This means that the layout of the board is an unholy mess and tracing each trace by hand is not a pleasant prospect. Thankfully I know how to use a mouse as well as a soldering iron, and the software solution proved to be easy.
I started by running the keyboard layers through a scanner. After messing with a number of settings, I wound up with 200 DPI on a black background. The black background was the most important part, I could probably have gotten away with a lower resolution. I imported the images into GIMP, cleaned them up a bit, messed with contrast to get the leads clearly displayed, and then highlighted in the individual leads with different colors using the fill tool. I added layer with the names of the keys and copied the data to a table. This made finding out which wires went to which keys a simple lookup.
The next step was to assemble the keyboard. The individual keys were selected, sorted, roughened with sandpaper to improve bonding, and then adhered to a square aluminum pipe with JB Quick. I did about 4 keys at a time, any more and the epoxy would set. The keyboard layout is a slightly modified QWERTY keyboard, with the symbol keys moved away from the pinkie fingers keys and the numbers moved to the vertical row in the center. This was one of the more boring parts of the job, but I had to do it first so I would know the exact size of the keyboard sections so I could cut the frame accordingly.
1/2 inch PVC pipe was used to hold the key bars together. I used a combination of cutting and fire to make the holes to fit the bars. Cutting involved using a dremel to make a hole of the proper size. The outline of the bar was traced onto the pipe, and then I used a small mill-bit style cutter to make the hole. The other method involved heating a piece of scrap bar with a propane torch and melting through a section of pipe. Both methods have pluses and minuses. The dremel method is faster, and doesn't produce noxious fumes (although it does produce copious amounts of PVC shavings) whereas the heating method is slower, but produces much better fitting holes with less effort. The main thing to remember if you plan on melting through PVC is to do it out side with a stiff wind carrying the fumes away. Burning PVC does not give off anything you'd wish to have in your lungs. Care must also be taken not to touch the red-hot hunk of aluminum.
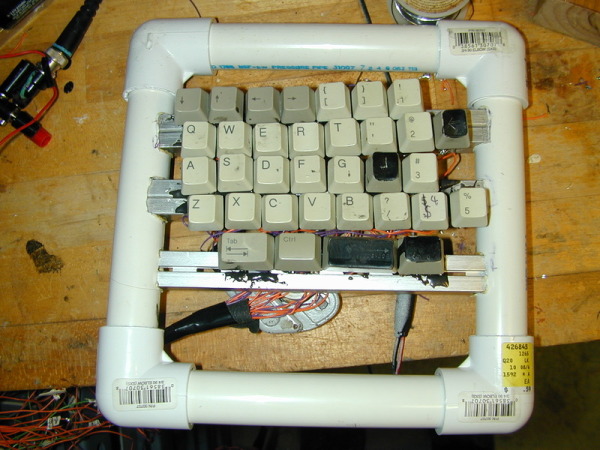
Soldering the wires to the keys was the most time consuming part of the process. 68 keys with 2 contacts each means 136 soldering operations, not counting tinning the leads and making & fixing mistakes. I did each half of the keyboard differently. The left keyboard I did in a haphazard manner, each time I needed a line from the circuit I would run a new wire, I didn't keep a log, and I did it over multiple sessions. This resulted in much confusion as to which wires ran where, what wires needed to be run, and what could be jumpered from existing joints. When assembling the right keyboard I pre-ran labeled wires from the circuit board to the keyboard, marked off where I ran the various wires in a notebook so I would know where to jumper from, and did it all in one sitting. The right keyboard was the easier of the two.
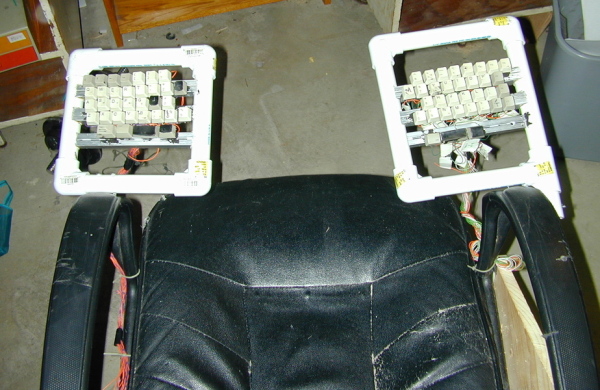
Once I had the keyboards together and working, I had to attach them to my chair. The left was easy; two screws through the PVC into the chair's arm did the trick nicely. After I attached the left half I realized that If I attached the right in the same manner the keyboard would be nicely secured, but the chair would be quite difficult to use. I needed some way for the right half of the keyboard to swing out of the way. After searching for quite some time for the something settable, I found the perfect hinge on my computer desk. A bit of screwing later and the right half of the keyboard swings out allowing for easy sitting and standing. It's kept in place with a pair of magnets from a hard drive, one epoxied onto the arm of the chair, the other epoxied to a screw running through the bottom PVC pipe.
I've been using the keyboard exclusively on my desktop for close to a year, and I like the results. For the first month, I had to resolder a number of leads and re-attach several keys, but after that all of the weaker joints were strengthened and the keyboard has held up well since. There's a few gotchas inherent in the chair mounted concept that should be mentioned. Firstly, you more or less have to sit down to type, and if you are working with someone else, allowing them to type means playing musical chairs. The height of the keys and the height of your desk may not mesh, and the added standoff distance can make mouse use uncomfortable. I don't have a problem thanks to the wrap-around desk I use, but your mileage may vary. You can find a gallery of all of the images I took of the construction here.
There are a number of possible improvements, from altering the layout, to selling my car and buying enough ScreenKeys to have a split-key Optimus maximus keyboard. One thing I do recommend is placing the keys in some sort of enclosure instead of leaving the bottoms hanging free. The completely open nature of the keys make crumbs a non-issue, but the wires are constantly at risk of snagging. The layout I chose lacks the delete key, making Ctrl-Alt-Delete impossible, but as I run Linux, this has only ever been an issue when I wanted to get into the BIOS. The delete key, a numeric keypad, F8-F12 and other missing keys were eventually added in the form of a separate custom keyboard, but that is a writeup for another day.
Cost breakdown:| Dell mechanical switch keyboard: | $2.00 | garage sale |
| Microsoft wireless keyboard: | $25 (after rebate) | staples |
| JB quick: | $5 | hardware store |
| PVC pipe and angle bars: | $10 | hardware store |
| total cost: $42. Most expensive project thus far. |
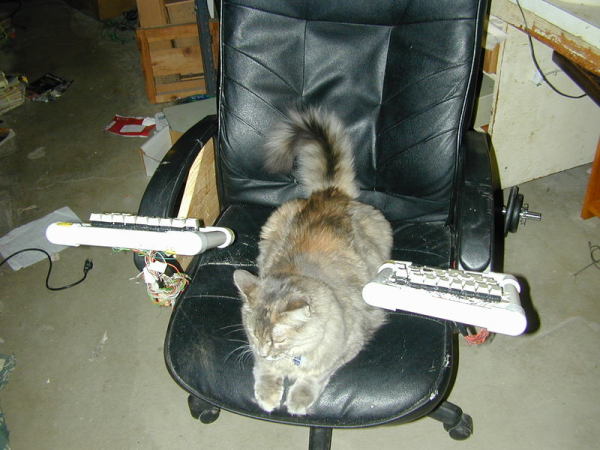
Keyboard with kitty. The use of this image in a cat macro is expressly forbidden.
If you wish to comment on this mod, send me an email at p@ohbah.com.
Return to index.


All works on this page is copyright 2009 Patrick Tait. Some rights reserved: 